
How To Find High Quality Leads
The Lead Finder helps you discover new leads that match your Ideal Customer Profile (ICP). You can search for prospects, reveal their details, filter results, and add the best leads to your Prospects list to run automated outreach sequences.
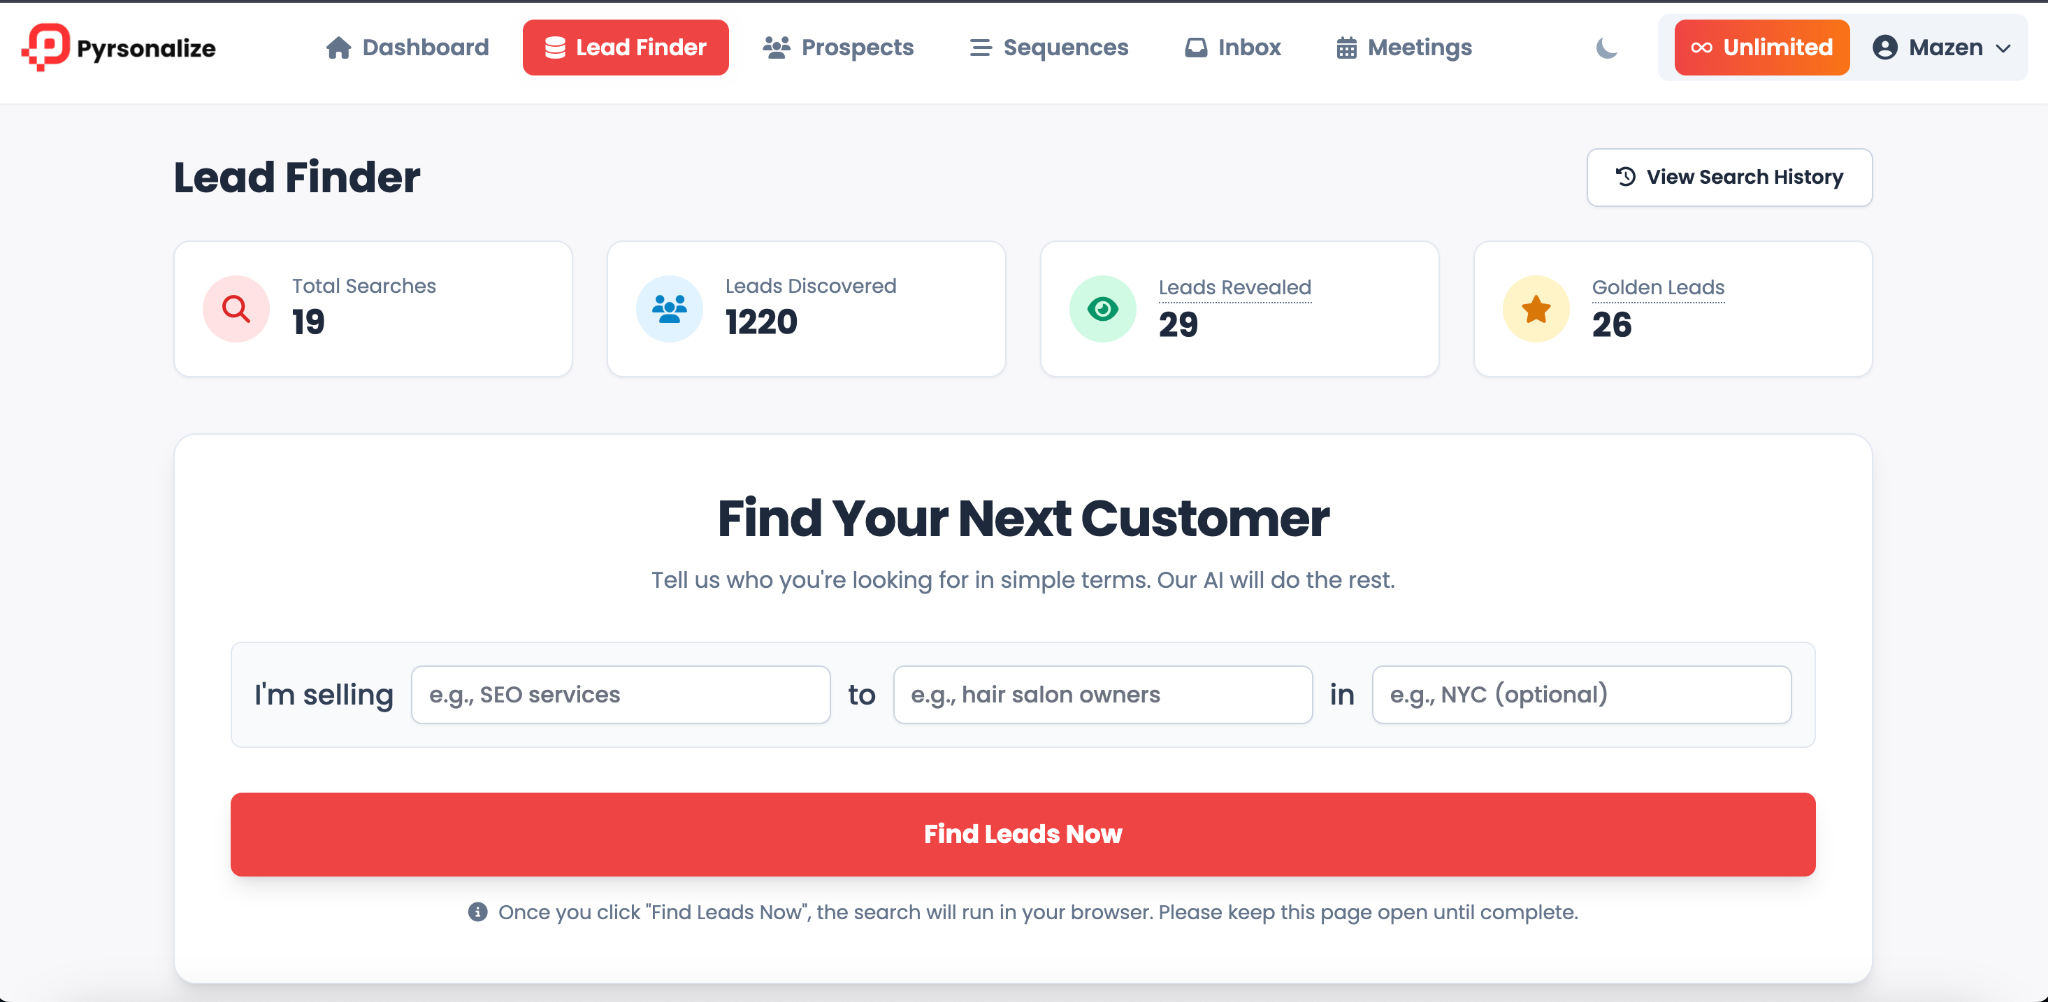
Step 1: Access the Lead Finder
-
From the top navigation bar, click Lead Finder.
-
You will see an overview of your searches, including:
-
Total Searches: Number of searches you have run
-
Leads Discovered: Total number of leads found
-
Leads Revealed: Leads where details were shown
-
Golden Leads: High quality leads that best match your ICP
-
Step 2: Start a New Search
-
Fill in the simple search form:
-
I’m selling: Enter the product or service you offer (example: SEO services)
-
To: Enter your target customer type (example: hair salon owners, dentists, startups)
-
In: (Optional) Enter a location for your search (example: NYC, London, California)
-
-
Click the red Find Leads Now button.
-
The search will run live in your browser. Keep the page open until the process is complete.
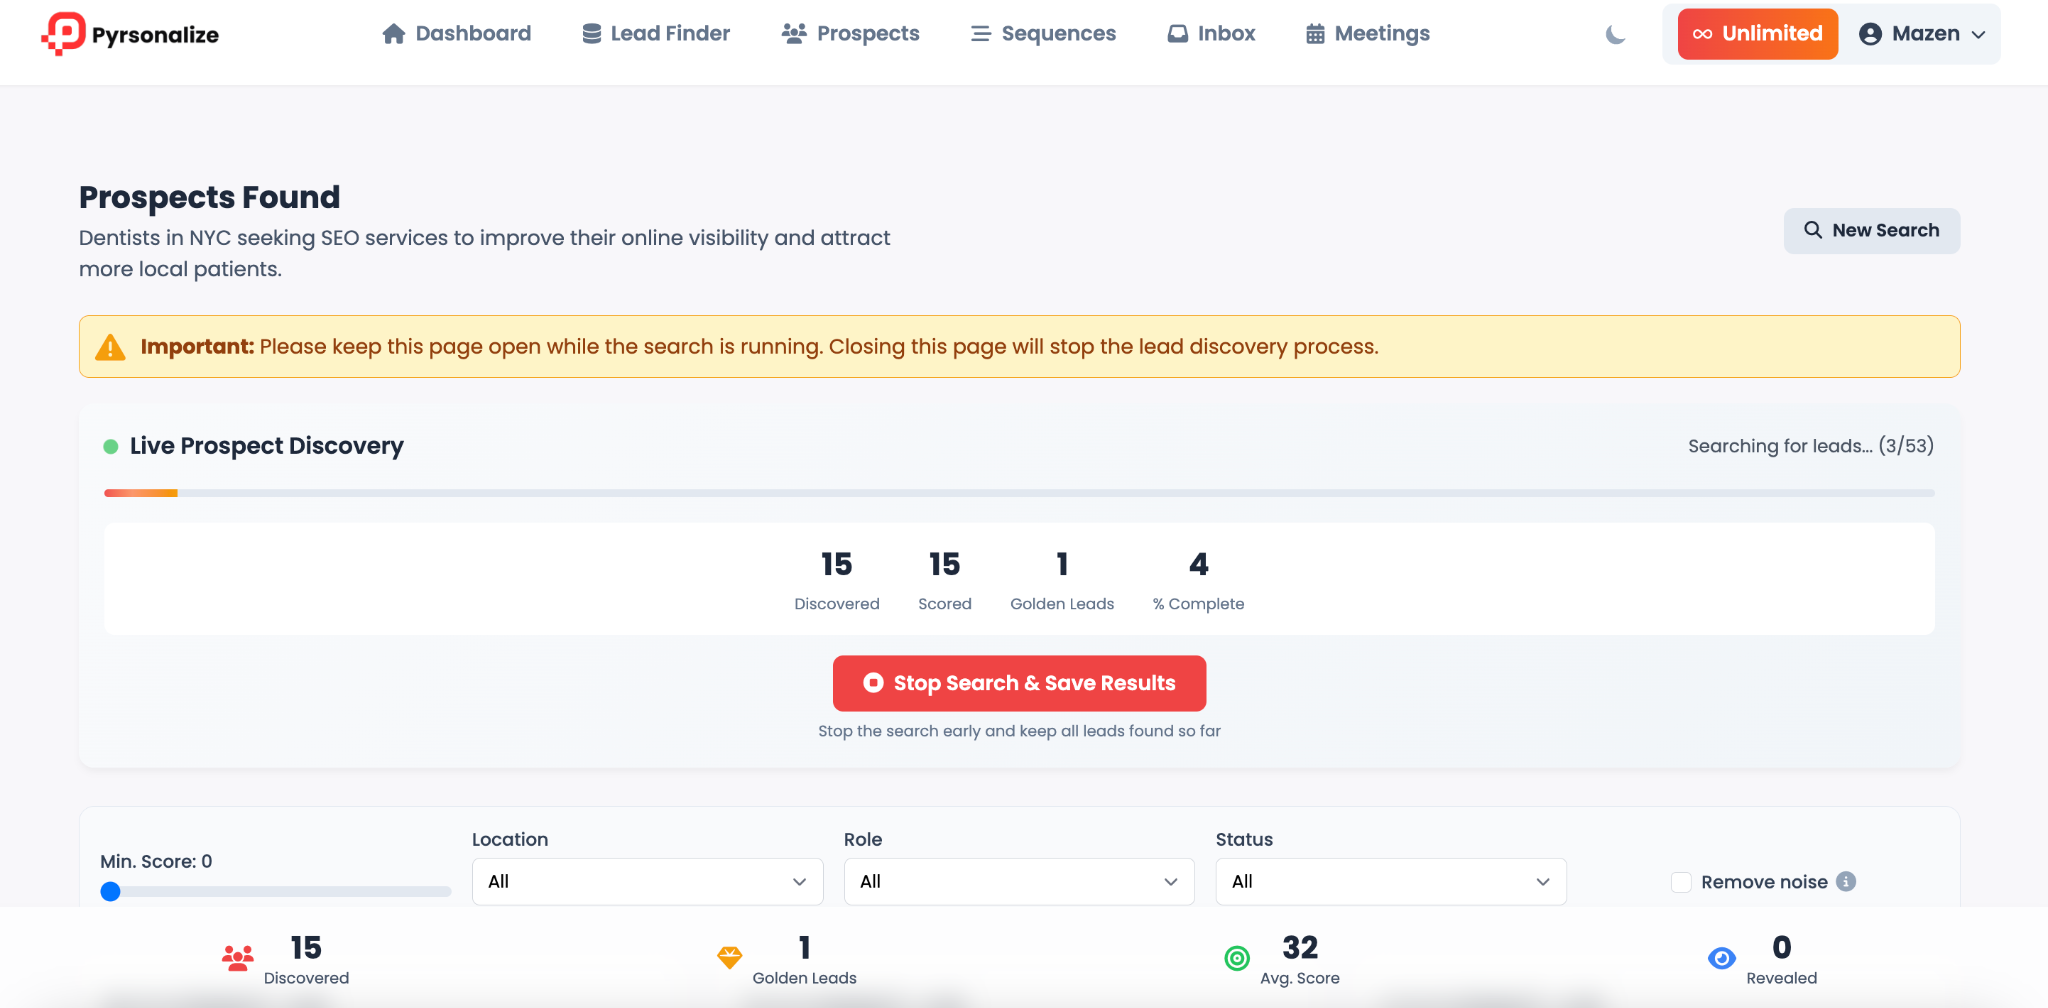
Step 3: Live Prospect Discovery
-
As the search runs, you will see real-time stats:
-
Discovered: Leads found so far
-
Scored: Leads scored based on relevance
-
Golden Leads: High quality matches
-
% Complete: Progress of your search
-
-
You can stop the search early by clicking Stop Search & Save Results.
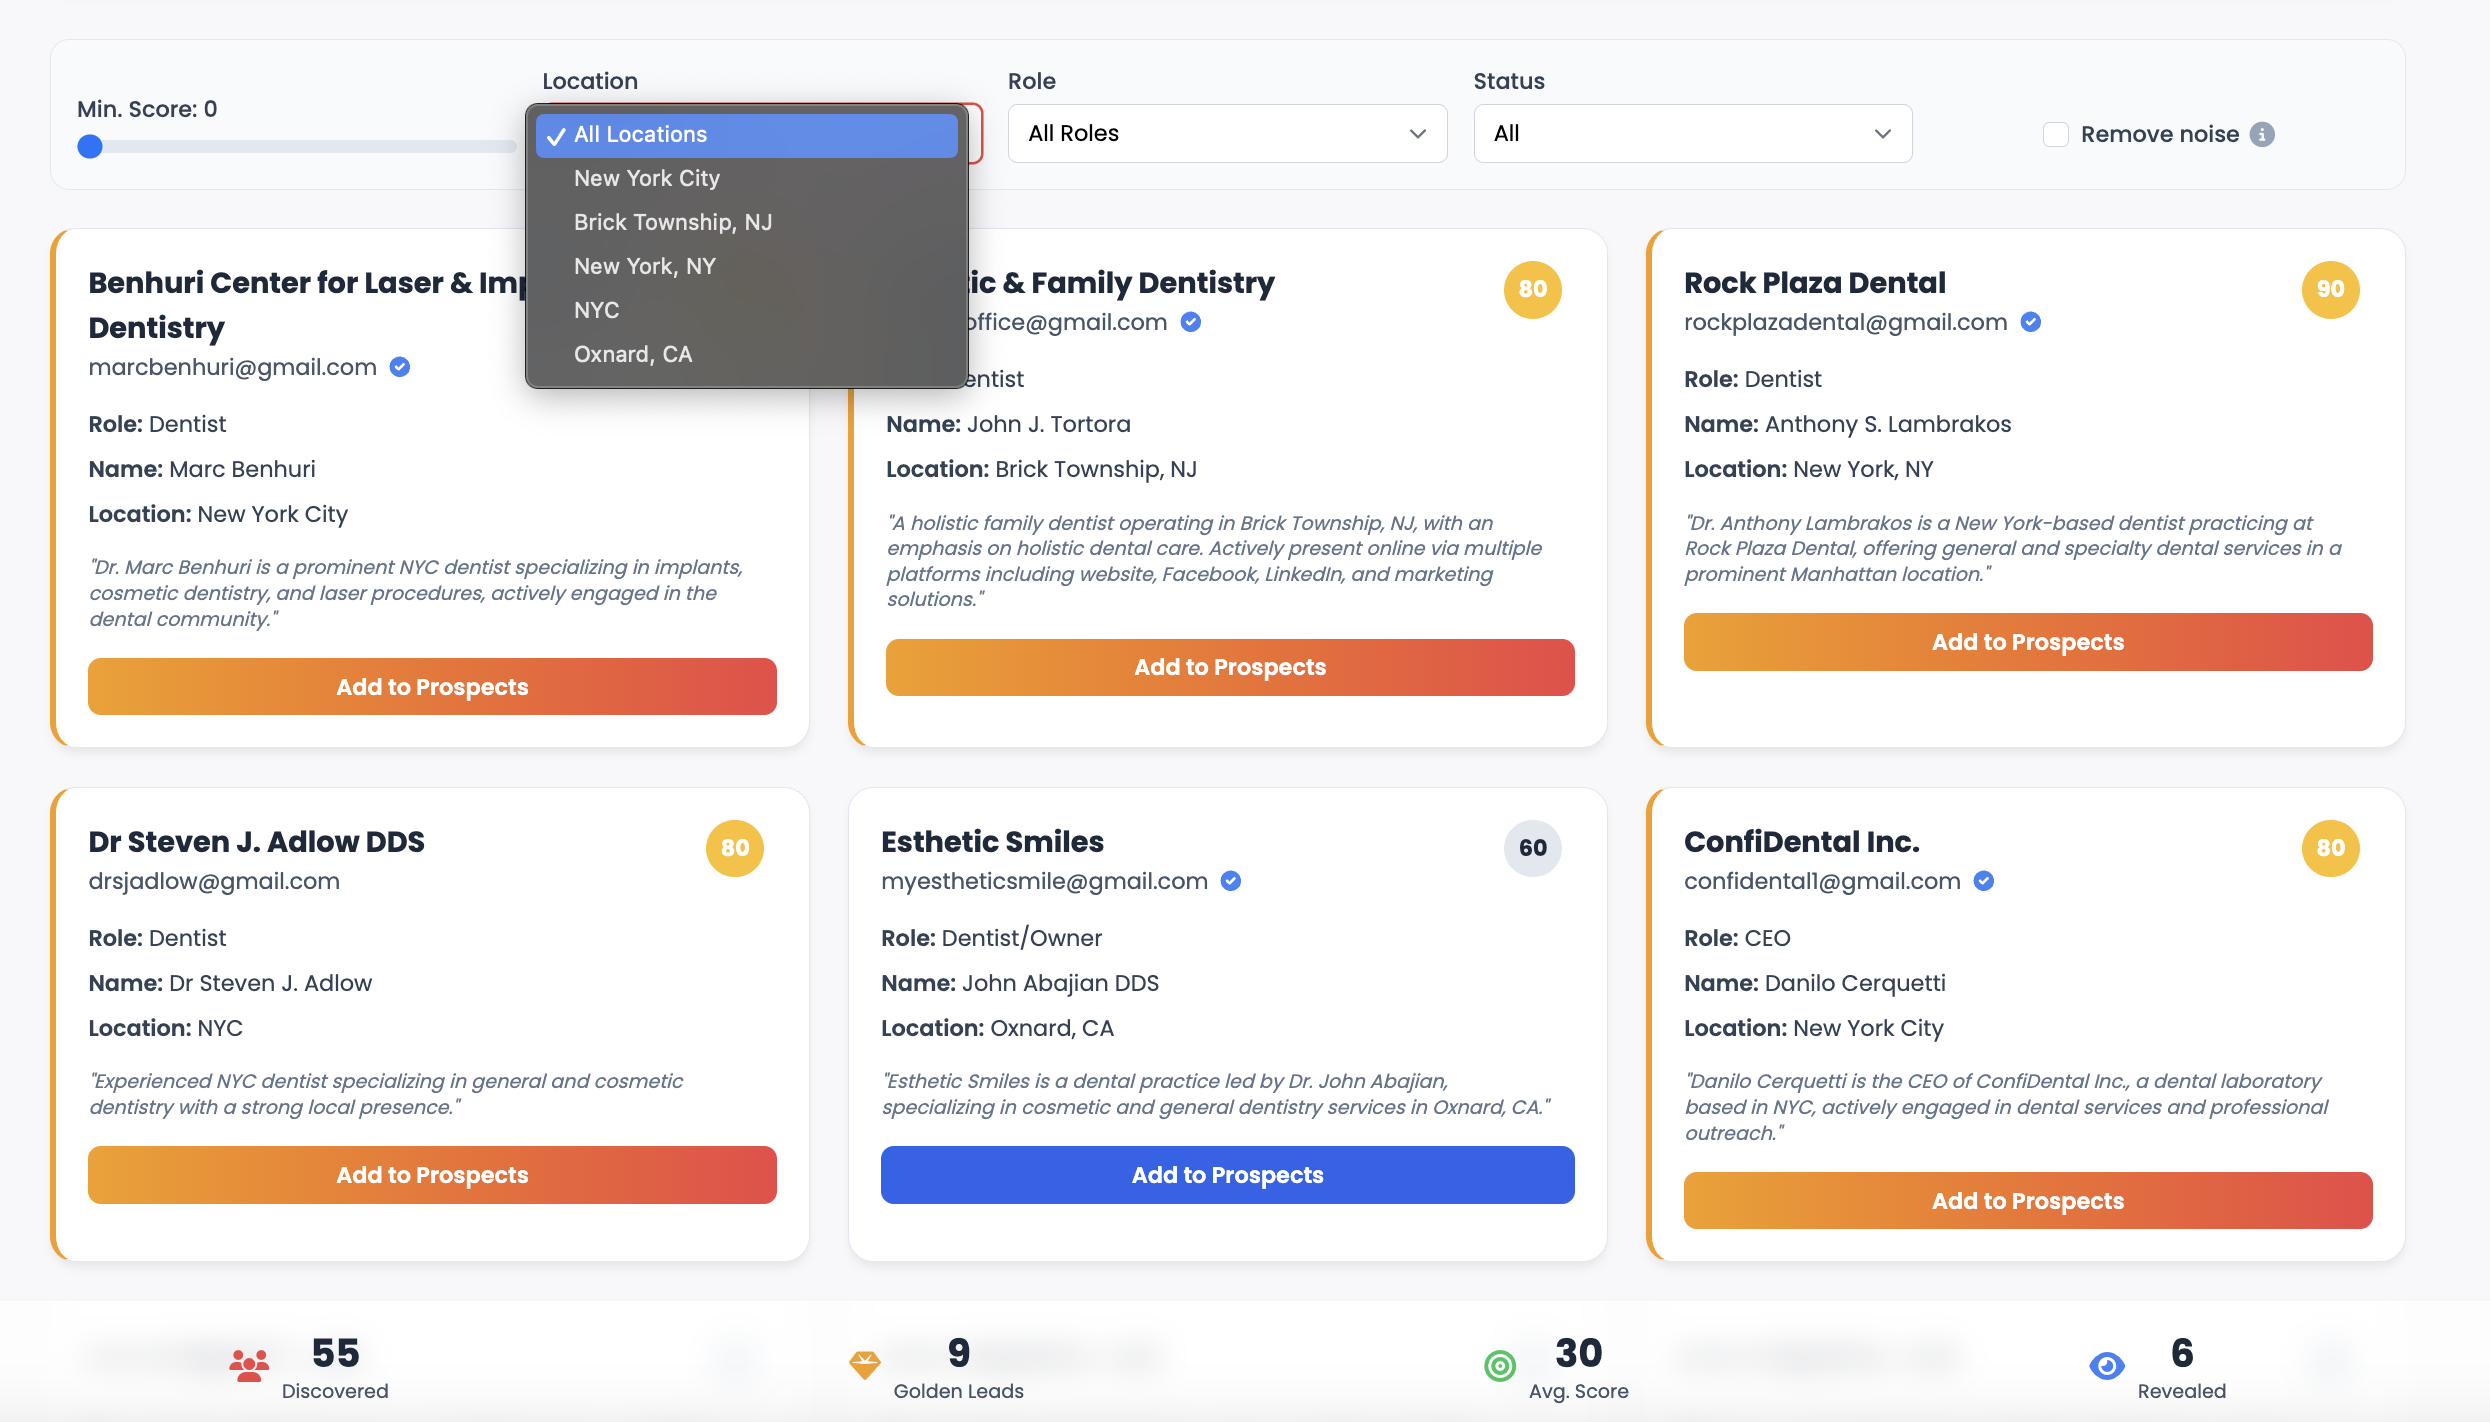
Step 4: Review Discovered Leads
-
Leads will appear as cards showing their email, role, name, and location.
-
Each lead has a Score that shows how well it matches your search.
-
Golden Leads are highlighted with a badge and higher scores.
-
You can use filters at the top:
-
Min. Score: Show only leads above a certain score
-
Location: Filter by city, state, or country
-
Role: Filter by job role
-
Status: Filter by discovery status
-
Remove Noise: Hide leads with low relevance
-
Step 5: Enrichment
-
Some leads may show “Waiting for enrichment” while the system gathers more details.
-
Once enriched, you will see additional context such as:
-
Full Name
-
Job Title / Role
-
Location
-
Company Information
-
Short Bio or Description
-
Step 6: Add Leads to Prospects
-
When you find a qualified lead, click Add to Prospects.
-
The lead will be moved to your Prospects list, ready for automated sequences.
-
Once added, the button will show a confirmation “✓ Added”.
Step 7: Manage and Use Your Leads
-
After building your list of prospects, go to the Prospects tab in the navigation.
-
From there, you can:
-
Launch automated email sequences
-
Track replies in the Inbox
-
Schedule calls and follow-ups in Meetings
-
✅ With Lead Finder, you can go from entering a simple search to having a verified, enriched, and organized list of high-quality prospects in just a few steps.